Running Vagrant + libvirt on Bluefin or Aurora
Vagrant is one of the greatest way to develop solutions using virtual machines, with all the isolation that a container can't provide. Unfortunately, Vagrant doesn't support libvirt out-of-the-box and the existing plugin must be built using your distro libraries. This post will guide you how to install the libvirt plugin on Bluefin or Aurora but it should also work on Fedora Silverblue.
Requirements
I'm assuming you are running an ostree-based distro. It works with a filesystem in the same fashion as containers images, with immutable layers overlaying each other and mount-points to mutable areas of the system.
I tested it on:
- Aurora (https://getaurora.dev/)
It should also work on:
- Bluefin (https://projectbluefin.io/)
- Fedora Silverblue (https://fedoraproject.org/atomic-desktops/silverblue/)
Install Vagrant
Using Aurora, prefer brew to manage your CLIs:
# Add the hashicorp/tap repo
brew tap hashicorp/tap

# Install vagrant for Linux
brew install hashicorp/tap/vagrant
Install vagrant for Linux using brew
Install the vagrant-libvirt plugin
Install the system dependencies and then install/build the vagrant-libvirt plugin.
# Install the `libvirt-devel`
rpm-ostree install libvirt-devel

# Reboot your system into the new filesystem state
systemctl reboot

# Install the vagrant-libvirt plugin
vagrant plugin install vagrant-libvirt
Install the vagrant-libvirt plugin
Find the best box for your needs
A Vagrant box is like a container image, if you are more familiar with that. It is the file containing all the OS packages of your virtual machine initial state.
WARNING: can be very dangerous to choose a random box from a source you do not trust. It is very reasonable an attack scenario where an infected box will search for secrets and upload everything to an attacker remove server. Be careful when choosing your box.
- Go to: https://portal.cloud.hashicorp.com/vagrant/discover
- Filter by
libvirtboxes - Select one you thrust (I chose centos/stream9)
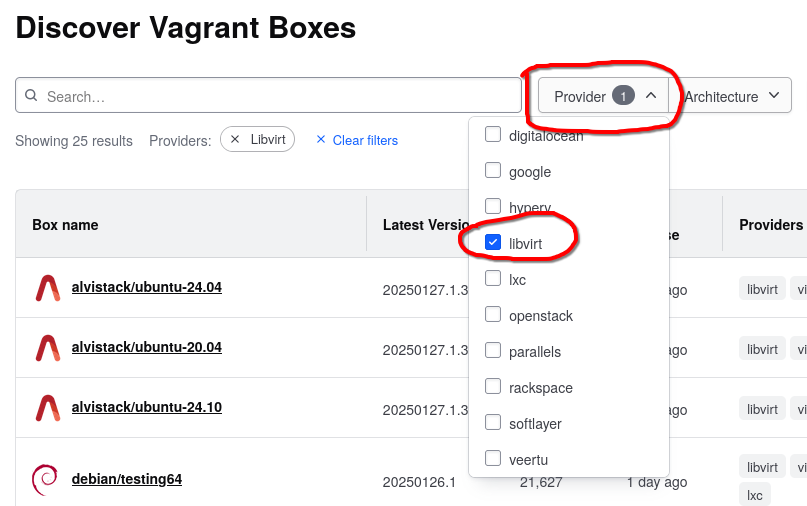
libvirt supportCreate a new project
I chose the centos/stream9 image: https://portal.cloud.hashicorp.com/vagrant/discover/centos/stream9
If you open this page, you can see the commands you need in the right side of that page but I'll repeat them here:
# Create your Vagrant project dir
mkdir my-project

# Enter into the dir and init the box `centos/stream9`
cd my-project
vagrant init centos/stream9

# Start the VM
vagrant up --provider libvirt

# SSH into the VM
vagrant ssh
Create the virtual machine
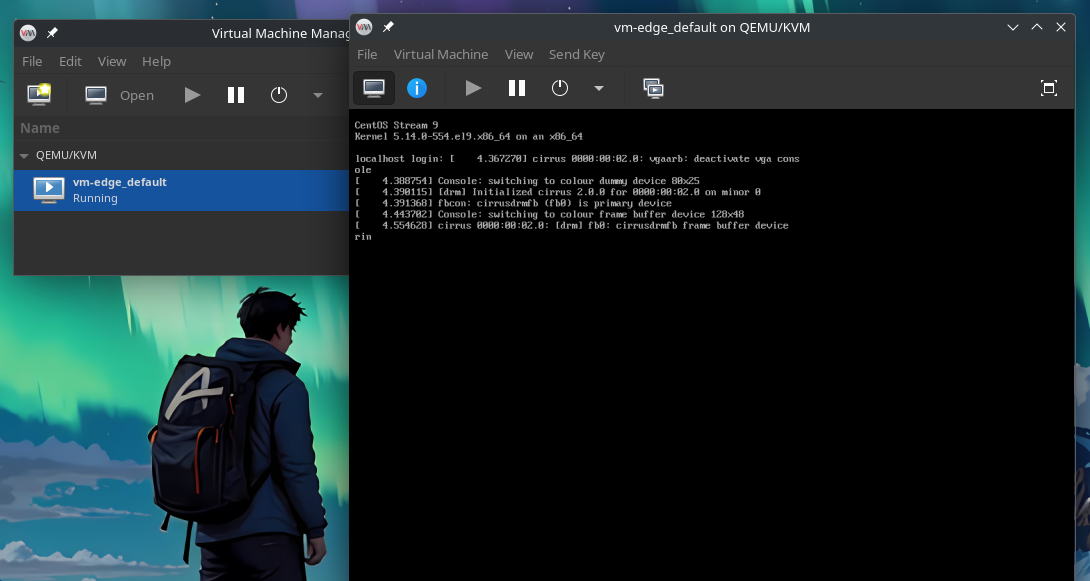
Check if everything is working
Open your Virtual Machine Manager and check if your new Vagrant machine is up and running:
So, that's it! 😄
Everything is working and you can start creating your stuff using libvirt and vagrant from this point.